Creating and Sending a Calendar Event in Live Chat
Use the calendar icon to create and send a file that can be added to a smartphone calendar.
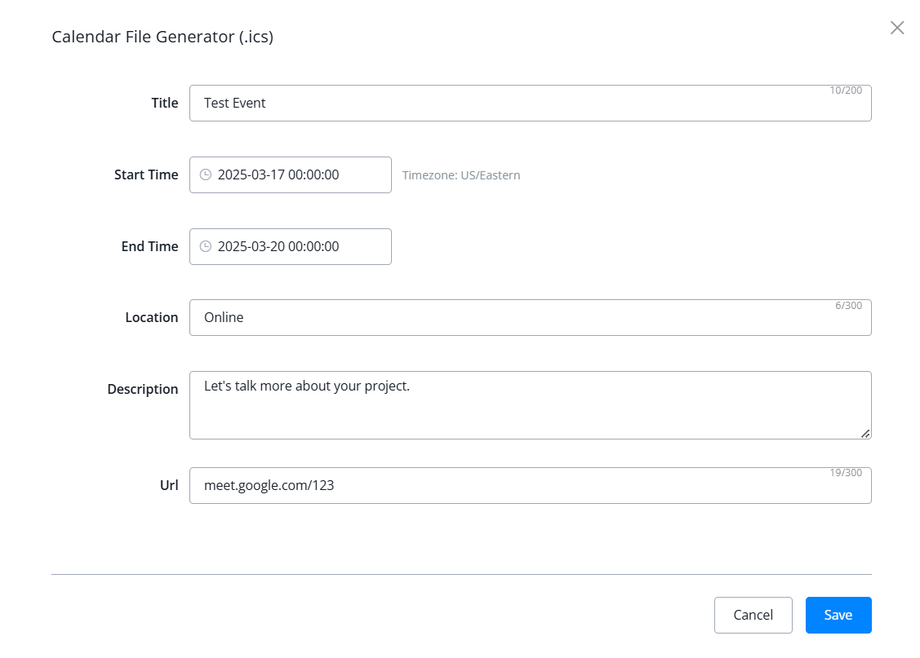
1. Click the icon to bring up the form fill to create the calendar file.
✓ Pay attention to the time zone listed next to the Start Time value. If you are speaking to a client in a different time zone than the listed time zone, make sure you account for this when scheduling.
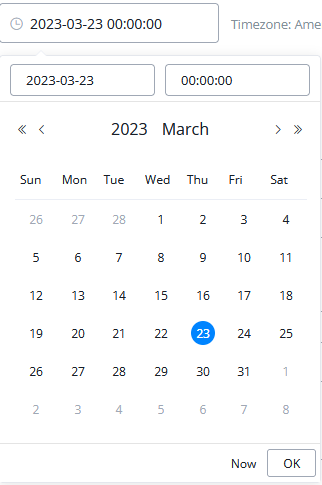
2. Select the Start Time to bring up the drop-down calendar and select the date of the event.
The start time will default to 00:00:00.
✔ Note that these times are listed in 24hour format with HH:MM:SS, so if you schedule a meeting for 6:30PM, enter the time as 18:30:00. You can either use the drop-down scroll menu, or type the time into the box manually.
3. Repeat this step for End Time.
4. Fill in the rest of the relevant details, and click Save. The calendar file has been generated and is ready to send.


