Live Chat Overview
Navigation
1. Sending Messages
There are three types of messages you can send in Live Chat message box: SMS, Email, and Notes. To send a message, simply type in the text box and press send.
By default, the message box is set to Reply, which means you will respond in the method most recently used by the contact. For example, if they answered via email, it would send an email instead of an SMS message. If the contact has not sent any messages back, it will default to SMS.

Delay a message by selecting the 🔽 drop down menu and selecting your desired time.

SMS
Short Message Service or SMS is the standard method of sending a text message to your contacts. You will send SMS messages by default. They appear in Live Chat as a gray box with black text. (See Above)
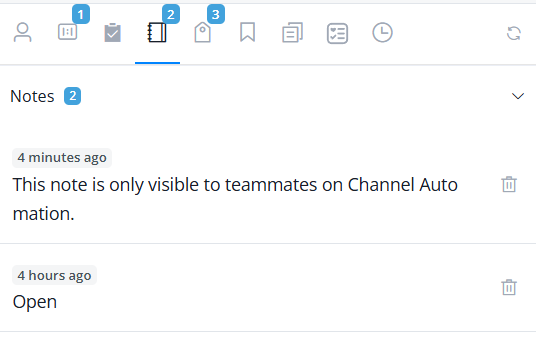
Notes
Notes are internal messages visible only to your teammates. They appear yellow in the Live Chat, and are saved in the contact's info. To send a note:
- Click Note at the bottom of the text box.
- Type your note as if it were a text.
- Press Send. The note will show up as a yellow box with black text.

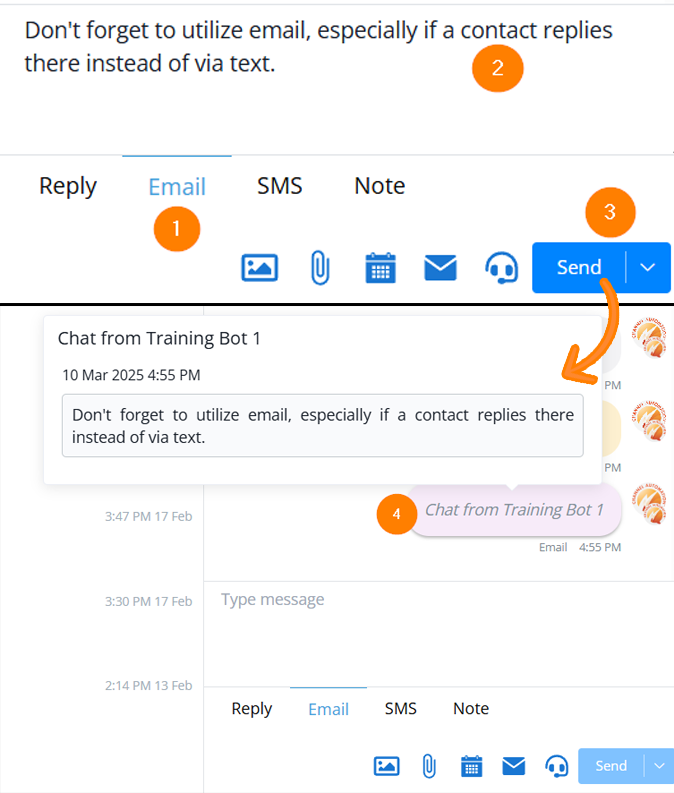
Emails
Emails appear pink in the Live Chat, with gray text. To send an email:
- Click Email at the bottom of the text box.
- Type your note as if it were a text.
- Press send. You only see the email subject in the chat log.
- Hover over the box in Live Chat to see the body of the email.
2. Conversation Status and Drop Down Menus
Assign an Agent
By clicking the icon at the top of the Live Chat box, you can assign a Live Chat agent to manage the conversation, or assign to no one by selecting none. Only one agent can be assigned to a contact at a time.
When an agent responds to a contact, it gets automatically assigned to them.

Change Conversation Status
Each company handles the conversation statuses a little differently. However, the most common use for each status is:
- Open: A contact has replied to you, and is waiting on a Live Chat agent to answer them.
- Pending: An ongoing conversation between a Live Chat agent and a contact. The agent has replied, and is waiting on the contact to get back to them.
- Done: The Live Chat agent has replied to the contact, but doesn't need to closely monitor the conversation.
- Spam: Spam messages.
- Invalid: A prospect has opted out, OR is otherwise not to be contacted, without having opted out.
- Unsubscribe from Bot: No further messages or automation will go out to this contact. When a contact is opted out, they are automatically unsubscribed from the bot.

Manage Shortcuts
Shortcuts are canned responses saved to Channel Auto so that you don't have to type the same message over and over. You can view and edit shortcuts by selecting Manage Shortcuts in the drop down. See Shortcuts to learn how to use them.


Filter Visible Messages
By default, Channel Automation Live Chat will show the entire activity log, including back-end activity and automation such as changing a contact's information, subscribing to sequences, etc.
Select the desired Message Type to see only messages of that type. For example, selecting Image will hide all back-end activity, as well as SMS, Audio, and Email messages.
Select the desired Sent By option, to see messages only sent by the User (the contact), the Live Chat agent, or the Bot (back end activity and automation.)

3. Live Chat Tools
Shortcuts
Shortcuts are canned responses saved to Channel Auto so that you don't have to type the same message over and over. To use a shortcut:
- Type a backslash / into the message box to bring up a list of shortcuts.
- Either scroll to find the shortcut you want, or type its name to search for it.
- Select the shortcut. This will auto fill the message box with the shortcut's text.
- Edit the shortcut if needed, then press send.

Dynamic Fields
Utilize User Fields by clicking on the </> on the right hand side of the chat box. For example, let’s confirm the contact’s email.

Search for the user field you want to use, and select it from the list. It will show up in the chatbox, which will then fill in with the contact’s information when the message is sent.
Note: If there is no information associated with the User Field, the space will show up empty when sending the text.
Finish typing your message and click send.

Here is how will look on the customer’s end:

Other Tools in Live Chat

On the right hand side of the chat window, there are a series of icons.
- Send a custom URL that changes based on the contact's information*
- Send an audio message
- Send an emoticon
- Send images
- Send an attached file other than images (VCFs, .gifs, etc)
- Create and send calendar events in Live Chat
- Manually trigger automation
- AI Agent Assist
